API Call Skill
Communication with external systems
Your Mattr AI Agents are powerful, but they often need to "talk" to your other business systems—like your Customer Relationship Management (CRM) software, payment gateways, or notification services. The API Call Skill is your workflow's direct line to these external systems, allowing your Agent to send information out or pull data in.
Automatically Notifying Your CRM of a New Client
Imagine your Mattr workflow processes a loan application, and once it's approved, you need to automatically update your CRM system with the new client's details. This ensures your sales or service team is immediately aware and can begin the next steps without manual data entry.
The Challenge:
Manually entering new client data from your loan application workflow into your CRM is repetitive, time-consuming, and can lead to errors.
The Solution:
By using an API Call Skill, your Mattr workflow can automatically send the new client's information to your CRM system as soon as the loan is approved. This saves time, improves data accuracy, and ensures a seamless handover to your client-facing teams.
Setting Up the API Call Skill for CRM Notification
Let's walk through how to set up the API Call Skill to send new client details to your CRM system.
Locate the Skill: Drag and drop the API Call Skill onto your Workflow Builder canvas. Place it in your workflow right after the skill that confirms the loan approval and gathers the client's final details (e.g., after an "Approval Skill" or "Data Extraction Skill").
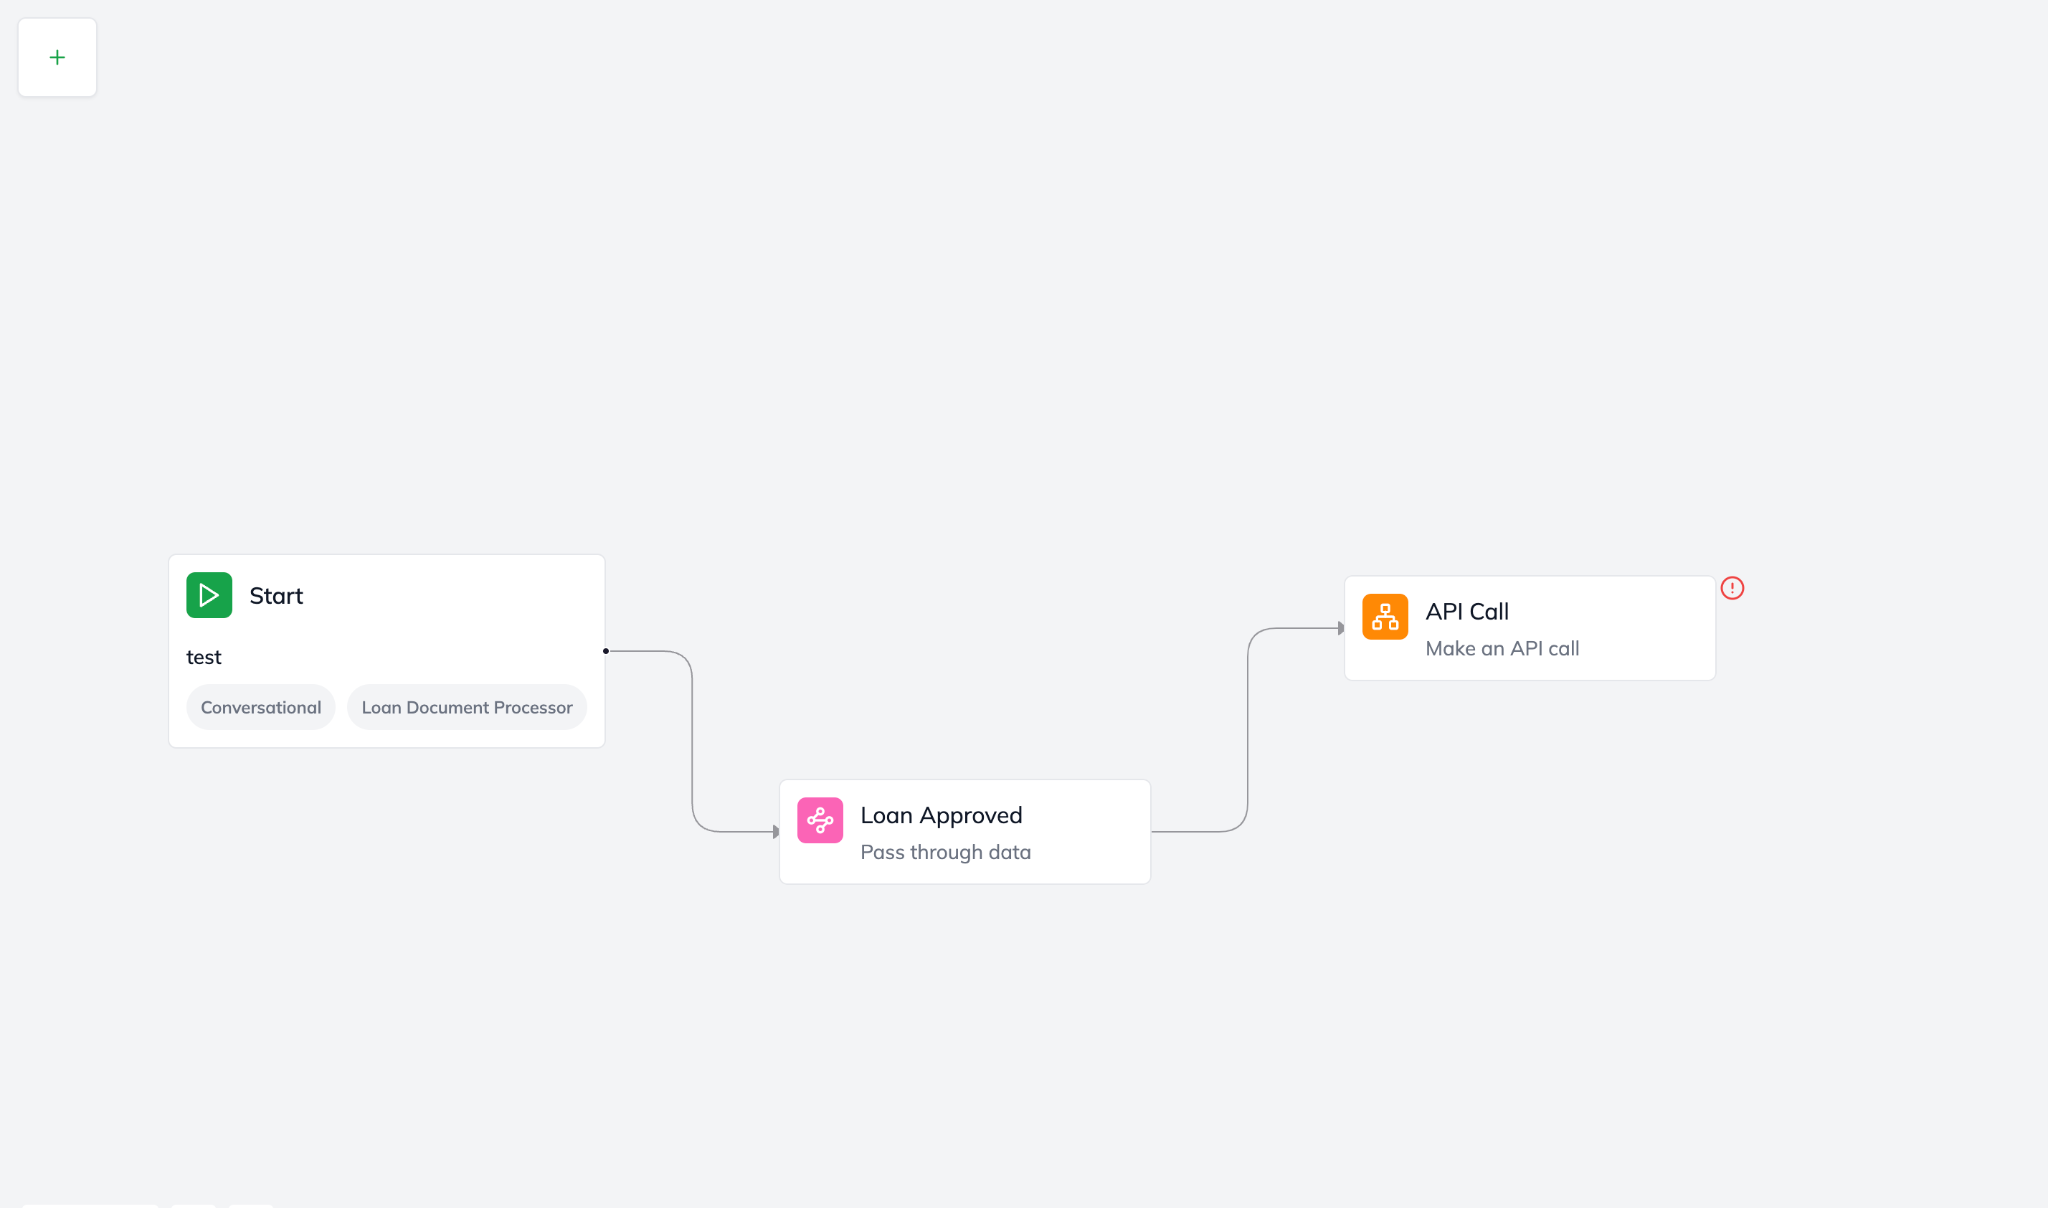
Adding the API Call Skill to your workflow after a loan is approved and the client details are finalized
Configure "Endpoint" (The CRM's Address): First, you need to tell the skill where your CRM system can be reached.
Click on the API Call Skill to open its configuration panel (usually the "Editor" tab).
In the Endpoint field, enter the specific web address (URL) your CRM provides for creating new clients (e.g., https://api.yourcrm.com/v1/clients).
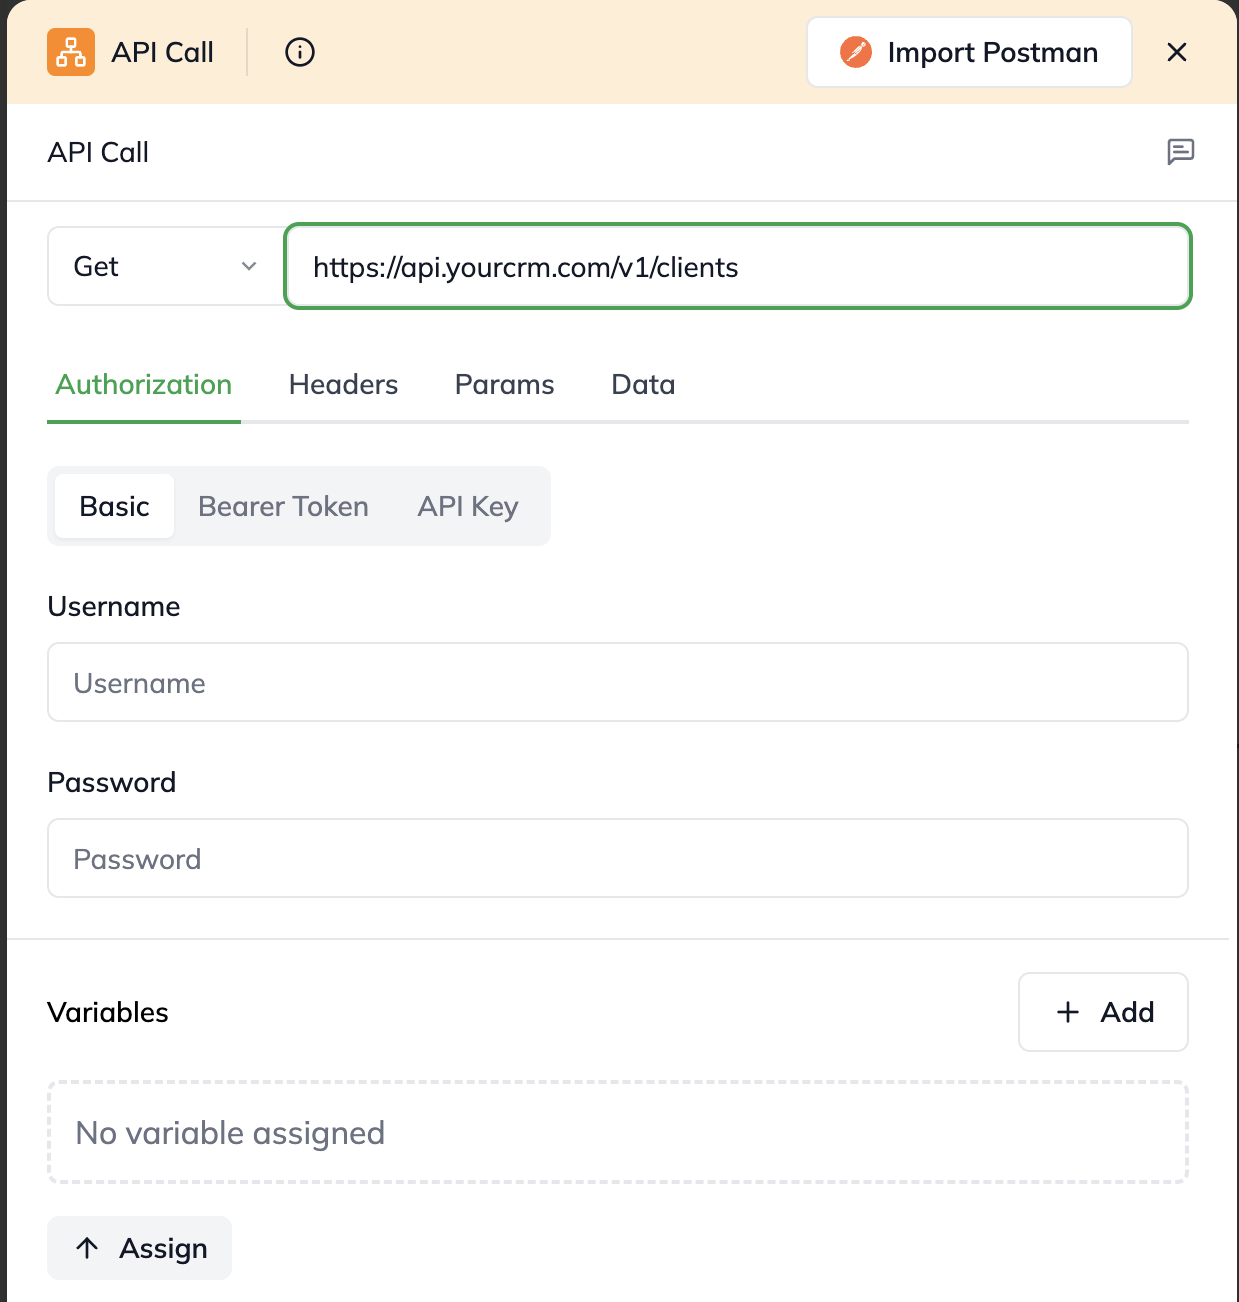
Defining the API endpoint to communicate with your CRM
Set the "Method" (What Action to Perform): You're sending new data to create a client, so you'll use a POST method.
Select POST from the Method dropdown.
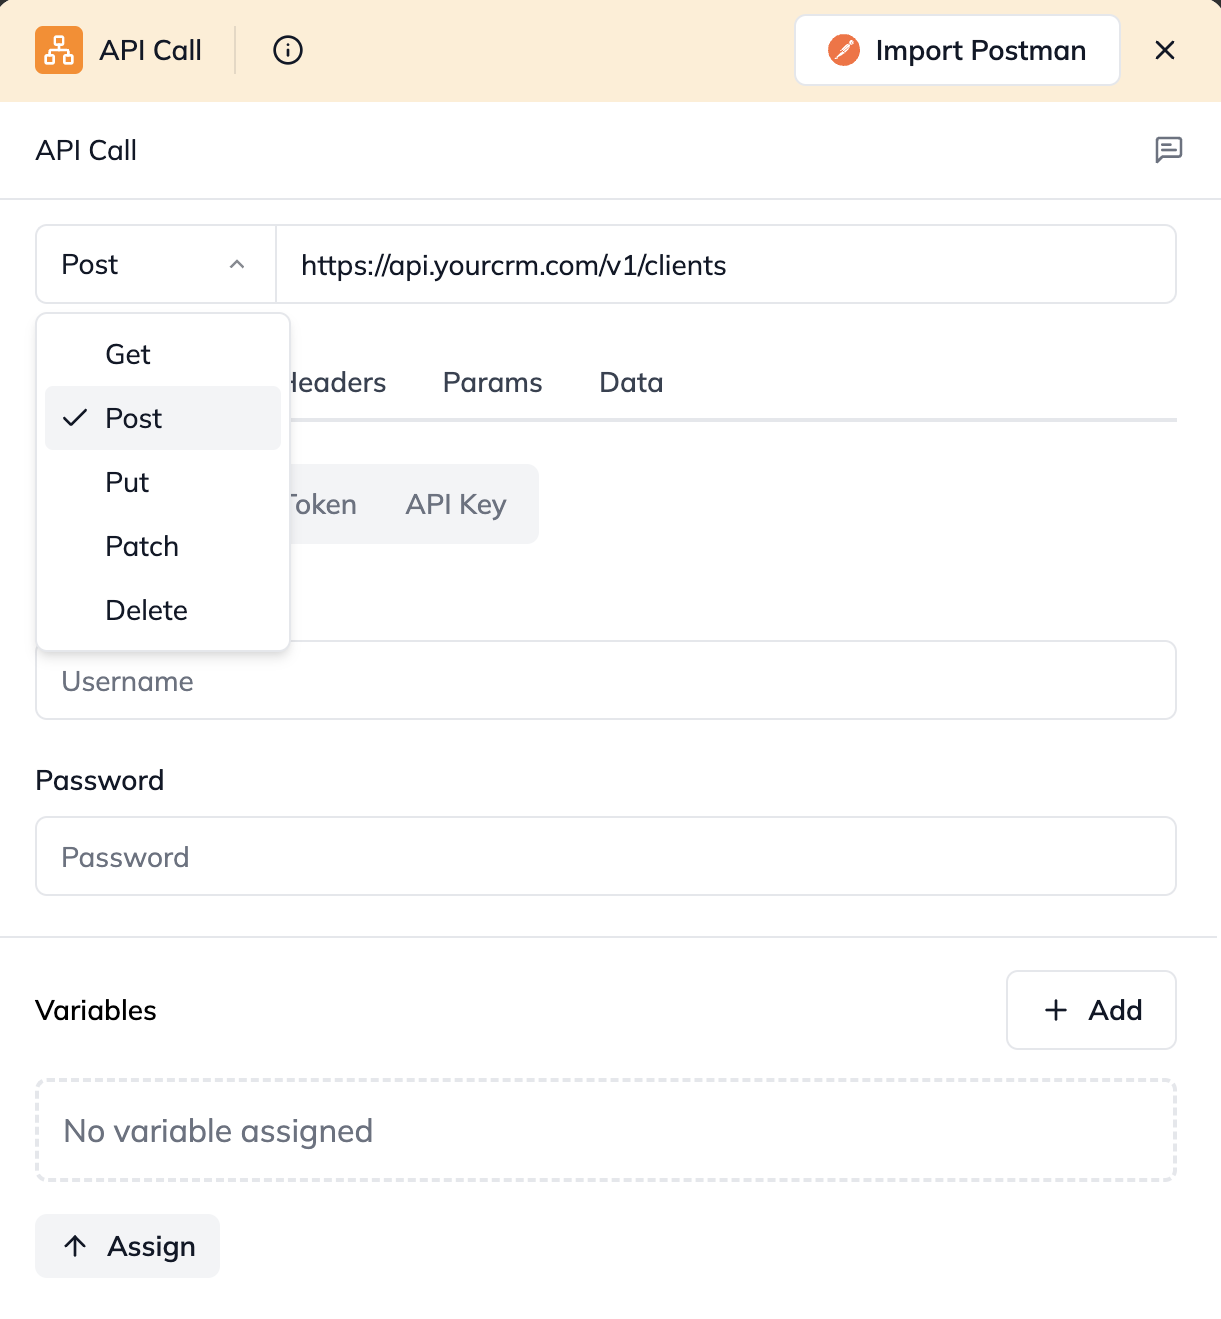
Choosing the HTTP method (e.g., POST) for your API Call
Add "Headers" (Special Instructions): You'll often need to tell the CRM what kind of data you're sending (e.g., JSON).
In the Headers section, click "Add More" (or similar).
Enter Content-Type as the Key and application/json as the Value. This tells the CRM to expect data in JSON format.
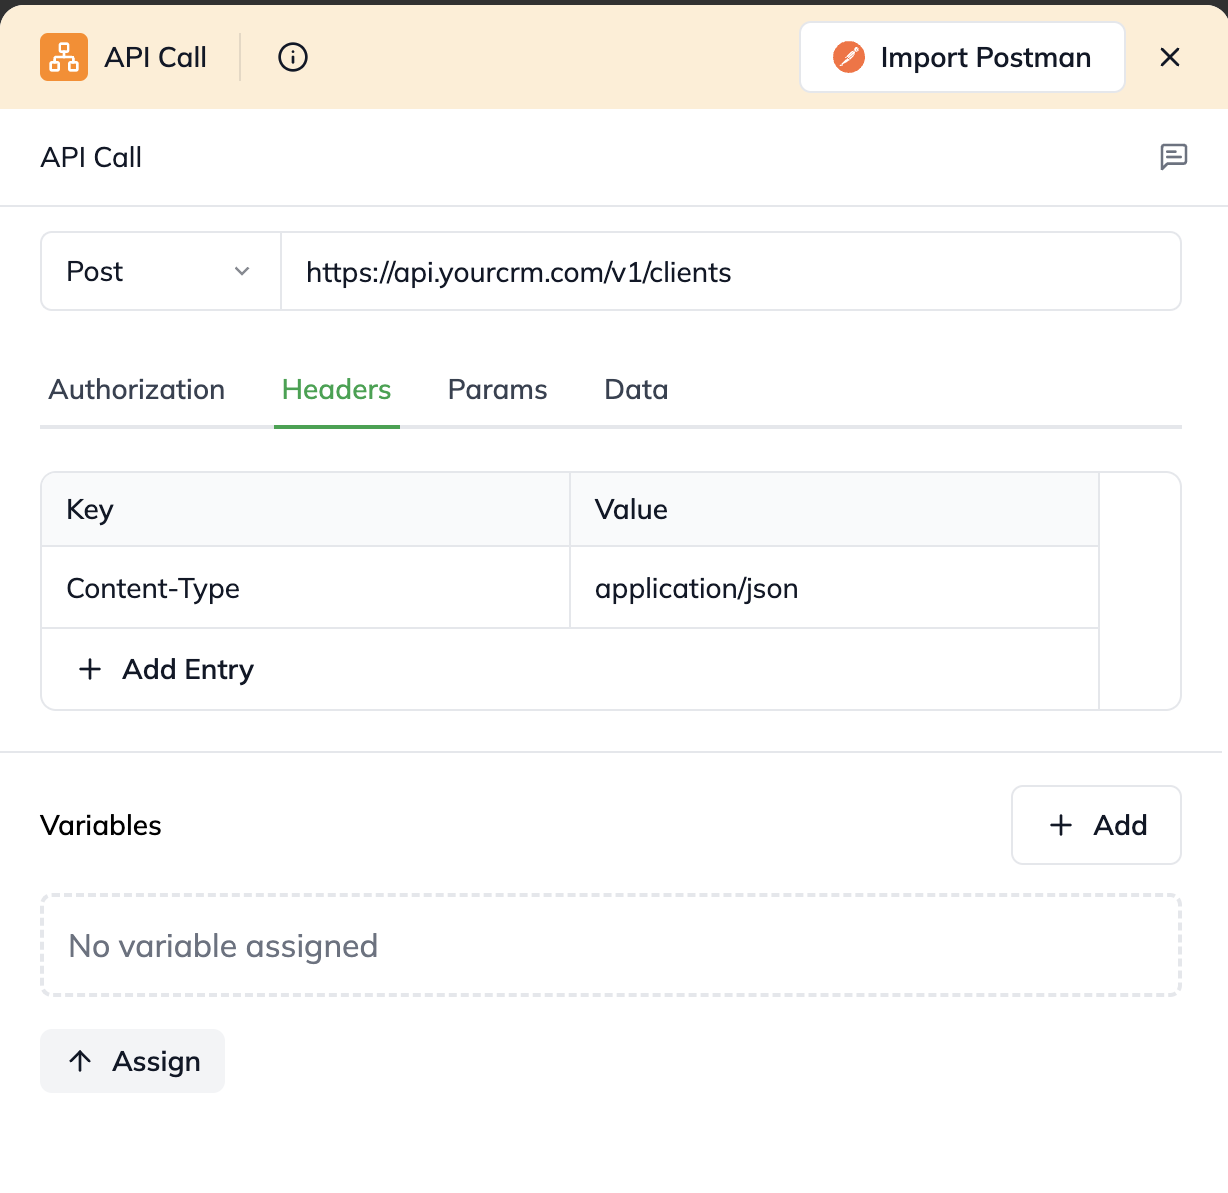
Adding 'Content-Type' header to specify the data format being sent
Prepare "Data" (The Client Details): This is the actual client information you're sending.
Select Key-Value (or Raw Data if you have a complex JSON structure) for the Data format.
Here, you'll map client details from your previous workflow steps. For instance:
Key: firstName , Value: $intput.clientDetails.firstName (assuming clientDetails is from a previous node's output).
Key: lastName , Value: $input.clientDetails.lastName
Key: email , Value: $input.clientDetails.email
This uses the outputs of earlier skills to dynamically populate the data for the CRM.
Configure "Authorization" (Secure Access): Your CRM needs to know who's sending the data. This is often done with an API key or a token.
Select the authorization type your CRM uses (e.g., API Key or Bearer).
Crucially: For any sensitive information like API keys or tokens, ALWAYS use a secret variable from your Uptiq.ai vault (e.g., $secret.CRM_API_KEY). This keeps your credentials secure and allows you to use different keys for testing and live environments.
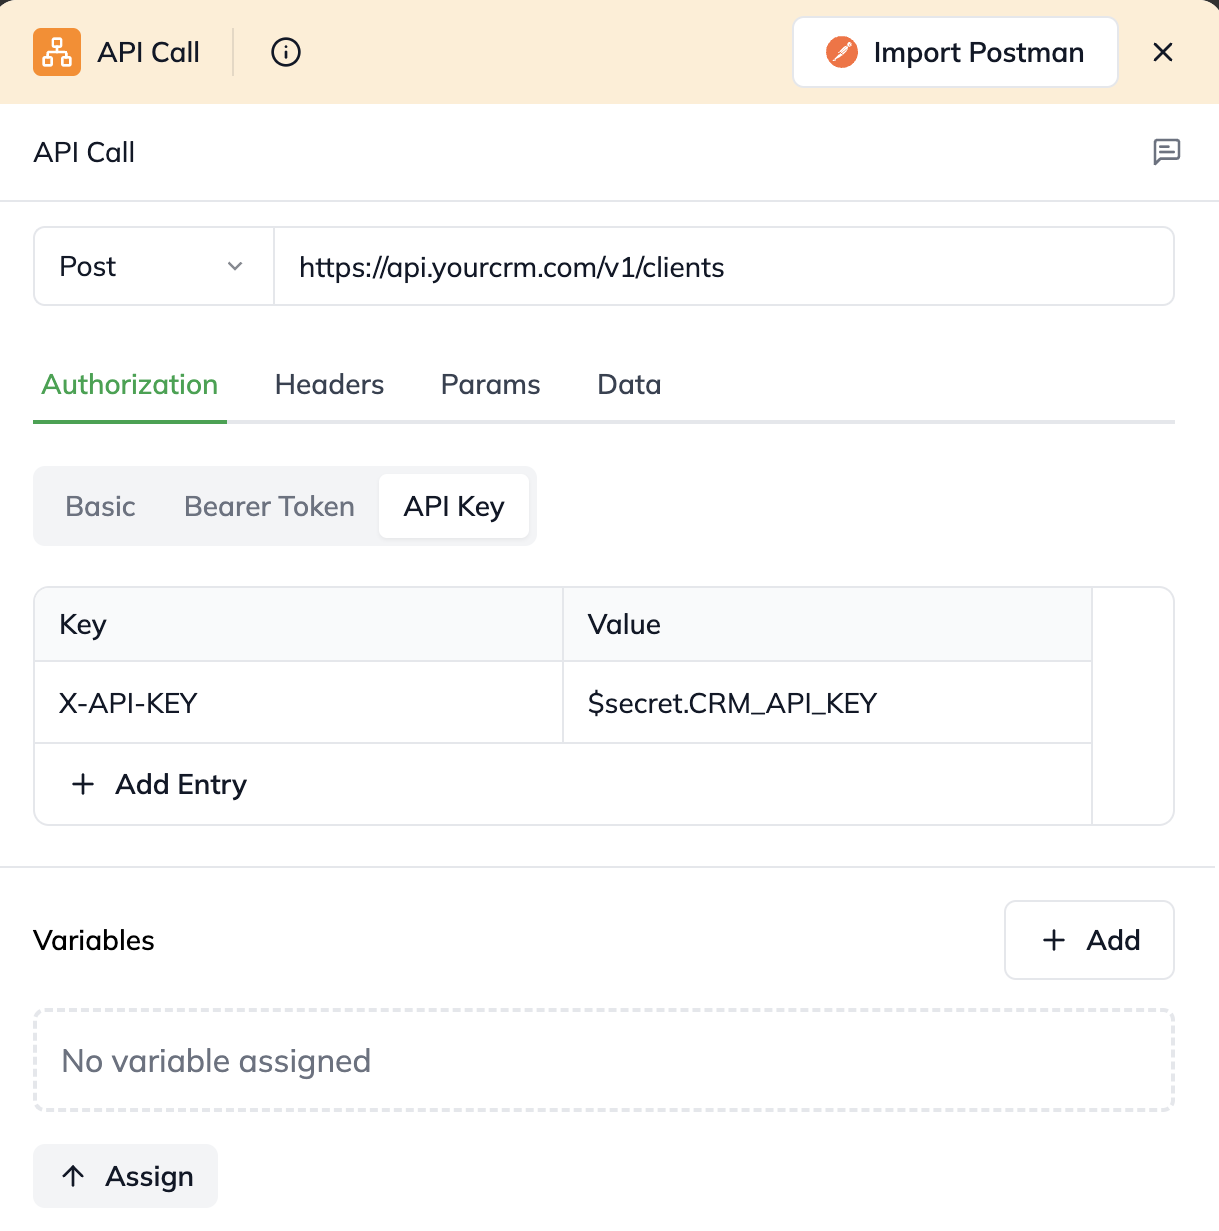
Setting up secure authorization using a Secret variable for your API key.
Testing Your API Call Skill:
The "Try Out" Sandbox
Before you deploy your full workflow, you can test your API Call Skill in a safe, isolated environment using the "Try Out" feature. This lets you confirm your skill is configured correctly and communicates with the external system as expected, without affecting live data.
Access "Try Out": In the API Call Skill's configuration panel, switch to the "Try Out" tab.
Provide Sample Input: If your API Call Skill relies on data from a previous skill (like our client details example), you'll need to manually provide that sample input here. Type in sample firstName, lastName, and email that your previous node would have produced.
Run & Review Output: Click the "Run" button (this will be visible in the final UI!). The Skill will execute your configured API Call using your sample input. The output will then appear in JSON format, showing you the response from the external system.
Understanding Test Results:
Success (e.g., statusCode: 200 or 201): The call worked! You'll see the data object filled with the response from your CRM, and the error field will be null.
Failure (e.g., statusCode: 400, 409, 500): The call encountered an issue. The error field will contain details about what went wrong (e.g., "HTTP_ERROR" or a specific message from the CRM like "Email already exists"). A statusCode of 0 means a network problem (like no internet connection to the CRM).
What to Expect as Output
After the API Call Skill runs (whether in "Try Out" or a full workflow), it passes on the following information to the next nodes:
statusCode: The standard HTTP status code (e.g., 200 OK, 404 Not Found).
headers: Any headers returned by the external service.
data: The actual response data from the external service (if the call was successful).
error: Details about the error if the call failed (e.g., "HTTP_ERROR" or a specific error message). This will only be present if an error occurred.
By mastering the API Call Skill, your Mattr workflows can seamlessly integrate with your entire business ecosystem, making your operations truly connected and automated!
Last updated